As an Amazon Associate, TrueNorth Tech X earns from qualifying purchases. Read our affiliate disclosure.
Thermal paste fills the tiny gaps between your CPU and its cooler so heat can move across properly. If you’re building a PC, fitting a new cooler, or your temperatures have crept up over the years, fresh paste is a quick and cheap job. This guide keeps it simple and covers how much to use, where to put it, and the mistakes to avoid.
Do you actually need to apply paste?
Not always. Many CPU coolers come with paste already applied to the base. If yours has a grey patch on the contact plate, you can fit it as it is. You only need to apply your own if the cooler has none, or if you’re removing and refitting a cooler, because the old paste should be cleaned off and replaced.
What you’ll need
- Thermal paste, such as ARCTIC MX-6
- Isopropyl alcohol (high strength, ideally 90% or more) and lint-free cloths or coffee filters, to clean off old paste
- A screwdriver for your cooler’s mounting screws
- Your cooler’s instruction manual
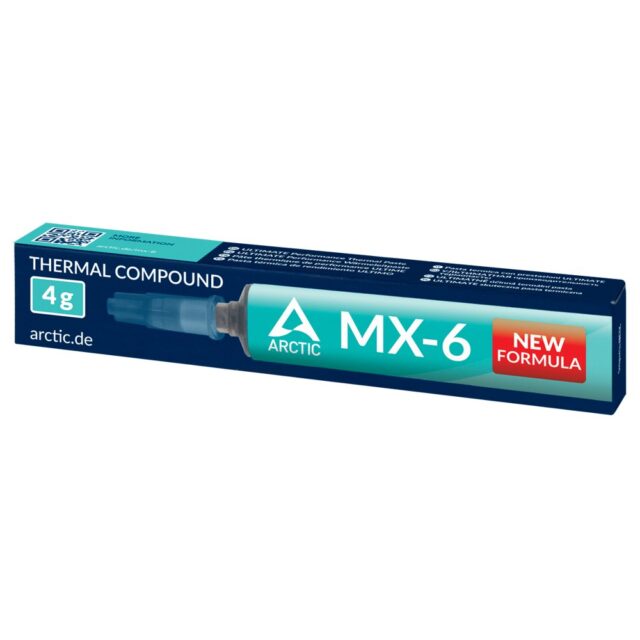
ARCTIC MX-6 Thermal Paste (4 g)
Non-conductive, no curing time, and a 4g tube does several applications.
Why MX-6? According to ARCTIC, it’s neither electrically conductive nor capacitive, so a little bit on the wrong spot won’t short anything. It also reaches full performance straight away with no “burn-in” period, and it’s designed not to dry out. ARCTIC says it’s too thick to spread with a spatula and should be spread by the pressure of the cooler instead, which makes the method below even simpler.
How to apply thermal paste: step by step
- Shut down and unplug the PC, then switch off the power supply. Touch a metal part of the case to discharge any static.
- Remove the old cooler (if there is one). Unscrew it a little at a time, then gently twist it side to side to break the seal before lifting. Pulling straight up can sometimes yank the CPU out of its socket on older AMD boards.
- Clean both surfaces. Wipe the old paste off the CPU and the cooler base with isopropyl alcohol and a lint-free cloth until both are clean and shiny. Let them dry for a minute.
- Apply the paste. Squeeze a small blob, about the size of a pea, into the centre of the CPU. Don’t spread it: the cooler’s pressure does that for you.
- Fit the cooler. Lower it straight down onto the CPU without sliding it around. Tighten the screws a few turns at a time in a diagonal (X) pattern, so the pressure stays even.
- Don’t lift it to check. If you lift the cooler off, clean both surfaces and start again with fresh paste, because air bubbles can get trapped.
- Reconnect and test. Plug the cooler’s fan or pump back into the motherboard header, power on, and check the CPU temperature in the BIOS or a monitoring app.
Tip: too much paste is a more common mistake than too little. If paste squeezes out over the edges of the CPU, you’ve used too much. With a non-conductive paste like MX-6 it’s not dangerous, but it’s messy and won’t help temperatures.
Quick FAQ
How often should I replace thermal paste?
There’s no fixed rule. Replace it whenever you remove the cooler. Otherwise, if your temperatures have risen noticeably over time and cleaning out the dust doesn’t help, fresh paste is worth a try.
Is a pea-sized dot right for big CPUs?
A centre dot is the simplest method and a good starting point. For larger CPUs, check your cooler’s manual or ARCTIC’s application video, which shows how to avoid air pockets.
Can I use thermal paste on a console?
ARCTIC says MX-6 is suitable for direct-die cooling such as graphics cards and console processors. But opening a console is a much bigger job and can affect your warranty, so we wouldn’t recommend it for beginners.
Need a new cooler while you’re at it?
If your current cooler isn’t keeping up, our air cooler vs AIO guide explains which type suits your PC. Popular picks in our shop include the Cooler Master Hyper 212 Black and the Thermalright Peerless Assassin 120 SE.